Pages

Showing posts with label aprons. Show all posts

Wednesday, December 29, 2010

Shout out - Erin Tagle Designs

I recently participated in The handmade gift exchange host by Craftaholics Anonymous. If you don't follow her blog you should it's fantastic:


I got to exchange gifts with a great designer. Her name is Erin Tagle of Erin Tagle Designs. 


She makes adorable clothing for little diva's and dudes. From Dresses , shoes, headbands and onsies. You can check out a few of her designs in her Etsy shop.


Here are a few things I received from her in the gift exchange!


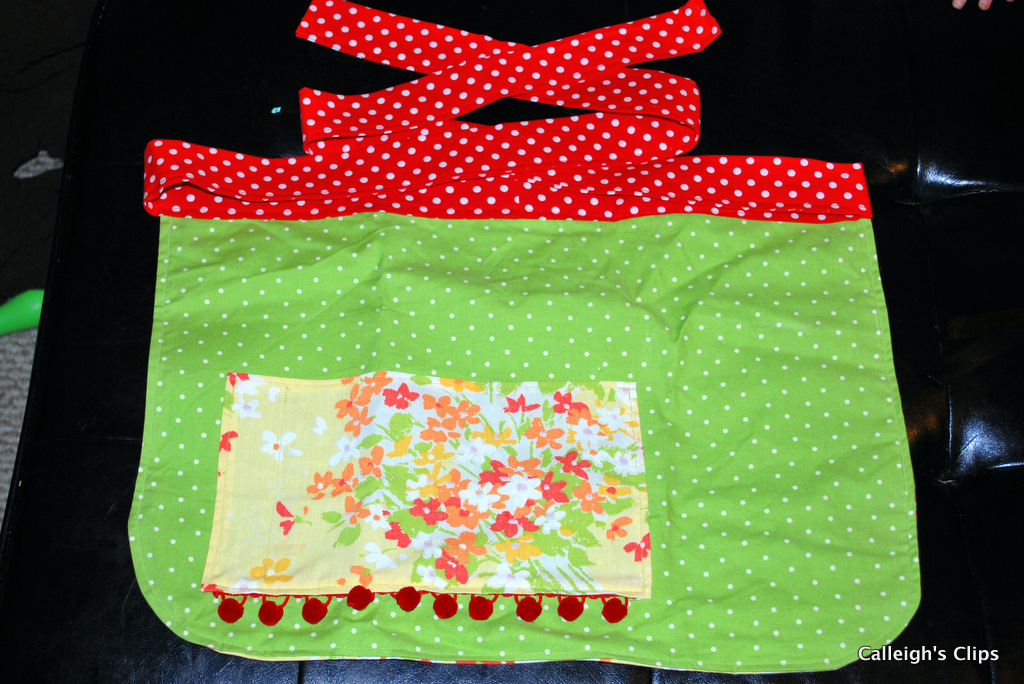
I received this adorable apron. I love the colors, prints, and trim. It is very well crafted.


This was my favorite item. It's a silk flower ribbon belt. I've worn it a ton already and gotten tons of compliments. It has  long satin ribbon ties so it can fit anyone and if you need shorter ties just trim it down. It is very well put together. the flowers are sewn to felt backing which gives  is some support and not floppy. 

She also included these crayon mold for the kiddos. I stuffed them in there stockings  for Christmas :)


Thanks Erin for such adorable items! I hope you'll check her out too!

Blog
Etsy
Facebook


Sunday, August 22, 2010

Tutorial Bandana Apron

Oh sew easy Bandana Apron- takes maybe 10 minutes or less. Can be made for as little as $2.00

I get bandana's and ribbon at hobby lobby. Most bandanas are .99 -1.99 and ribbon is 1.99-3.99 but the ribbon is usually 50% off. Not every week but almost every week. If it's not on sale give it a week or two and it will be. I  know that the ribbon is on sale this week Aug 23-Aug 29, 2010

Materials:
one Bandana 22x22 (standard size)
60 inches of grosgrain ribbon 5/8's or larger (whatever you prefer- Just about any size will do)
Sewing machine and white or coordinating thread
iron


1. Iron your bandana
2. pin ribbon to top edge of the bandana (right side up)
3. Sew together along the top edge and the bottom edge of the ribbon and your done!
    Be sure to back stitch  beginning and ending stitches. Also heat seal you ribbon ends to prevent fray.
I use a regular lighter, just be careful not to burn your finger. ( speaking from experience, but I use it on a daily basis making bows.)

I made mine slightly different because this bandana I bought had a defect - there was a random slice in the fabric along the top edge I missed when I bought it for a dress. Before I sewed on the ribbon I made two sewing lines about 1/4 inch apart and gathered up the bandana a little then I pinned on the ribbon and sewed it together like above. Here is mine! I just used what I had on hand. I'm going to eventually make up some zebra, leopard and other fun print ones too!


 These would make a great christmas present. Bandanas come in many prints and solid colors! You could also easily just use a scrap of fabric around 24 X24 inches you would just need to hem all the way around. If you make some up please feel free to email me a photo. I'd love to see what you come up with.


***don't know how to sew - try this no sew version I found on Ashely Ann's Blog

Enjoy! 

Favecrafts Apron Pattern ebook review

Favecrafts recently put together another free e-book for 8 apron patterns. They asked for people do review and I decided to give it a whirl.

Favecrafts is a fabulous website if you're looking for 1000 of different free ideas in sewing, crochet, knitting and so much more.

The free e-book includes patterns for a lined apron, Sassy Apron, Pillowcase apron, coffee bag apron, reversible scrap fabric apron, quick and easy apron, halloween apron and Cupcake apron.

I only tried 2 of them which included the pillow case apron and the quick & easy apron. I would love to try them all but don't have the time just yet. Maybe later.

The pillowcase apron was so easy. I think I made it up in less than 15 minutes. The instructions were easy to understand for me and I would consider myself a late beginner to sewing. I used to sew all the time growing up but just recently in the past year picked back up on it.

You'll have to forgive me but all my aprons are using John Deere Themed fabric, which is what my kitchen theme is because my hubby just loves John Deer and I like yellow and green so I just went with it.
Lol...i just noticed the pillow case fabric is upside down. That is what I get for sewing late at night . :) 

I like that you didn't have to cut anything out for the pillow case apron. You only have to make a few folds, sew them up and sew on ribbon. This makes a great craft apron and would also make a great gift. I like the two big pockets in the front and you could easily make it three pockets if you needed too. Don't have a spare pillowcase check thrift stores and dollar store for a cheap project.

The Quick and Easy Apron was just that only I added a few twists of my own. So it actually looks nothing like a half apron. Just picture the apron with out the bottom layer I added.  I'm not one to follow sewing patterns often. The instructions were very easy to understand and I had no trouble at all putting this one together.


I added a longer layer to the bottom that I ruffled a little and also added rickrack on the seam. 

Of the eight patterns I really liked the Sassy apron but I didn't understand the measurements. This may just be from me not reading patterns often but I found it confusing so I passed on it.  I read through all the other patterns and had not trouble understanding. I just picked out the quick ones for now.


Aprons are making a comeback this fall so why not try your hand at a few!

I actually am working on a tutorial for a bandana apron. You're going to love them and I can't wait to share!