Pages

Showing posts with label hat. Show all posts

Wednesday, January 18, 2017

Key Tab Ponytail or Bun Hat - Mommy, Me and Dolly!


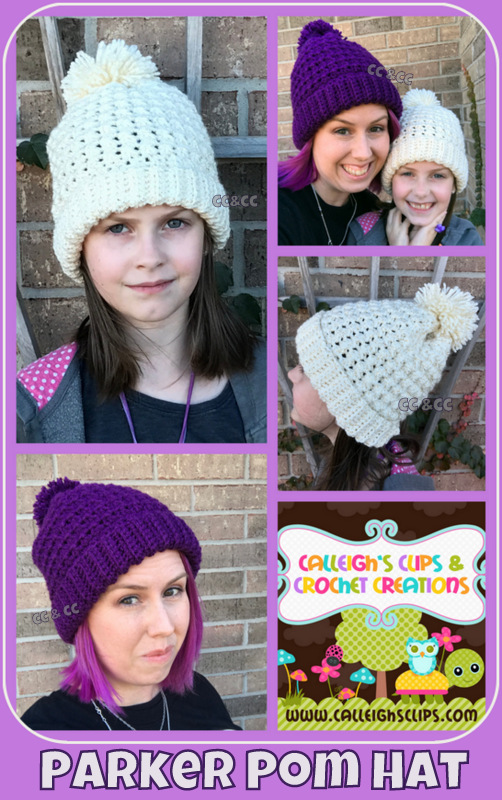
If you follow crochet trends you've for sure seen the surge in messy bun or ponytail hats! I love the idea. I connected with it as a runner sometimes you need more than just an ear warmer but you still want your hair off your neck. Some think it's silly and a year ago I might have said the same thing because I had a pixie hair cut. I would have no use for it LOL. I've let my hair grow now so I just really loved the idea. I've made a ton of them and I look forward to making more! You can buy a finished one from my Etsy shop 

I know there have been a surge of pattern so I wanted think a little different. Most I've seen are super bulky/chunky or basic. I thought My Key Tab Series Stitch would be easy to adapt to a bun hat but give it a light, lacy look that cozy but not to thick. especially if your weather isn't super cold.

I also decided it would be fun to write doll size, kids, youth and women's! This is a very easy pattern to adjust size or height to as well. I'll give some tips for that too if you do need to adjust . I hope you enjoy my design on this new popular favorite! 

I also found this amazing new yarn that is my current favorite! You know I love Hobby Lobby's I Love This Yarn Worsted. They came out with a few amazing color ways that are what I call twisted Rainbow colors. Even though they are Worsted the texture reminds me of a mix between Lion Brand Heartland and Simply Soft. I'm in love with the colors! I've picked up 4 different ones and I think there might be one or two more other mixes too. 


Key Tab Ponytail or Bun Hat

Be sure to add to your Raverly Favorites! 


Skill Level: Intermediate

Materials: 
Worsted Weight Yarn of Choice: 
In my samples I used the following: Hobby Lobby I Love This Yarn - Worsted Weight (4)
*Brights (rainbow/jewel tones, Blue Multi (blue/purple/pinks) 
 or Lion Brand Heartland  Worsted Weight (4) (as I used in my original key tab series)

*Hook size: H - (5.00 mm)
*Tapestry Needle

*Ribbing Gauge 2” x 2” swatch =  8 rows of 8 sc 
*Body of Hat Gauge 2” x 2” swatch = 4 rows of 8 dc

Terms and Stitches used:
(ch) chain, (st) stitch, (sp) space, (sl st) slip stitch, (sc) single crochet, (dc) double crochet, (rep) repeat, (blo) back loop only, (YO) yarn over

Special Stitches: 
*Three Double Crochet Cluster (3dc cl)
YO hook insert hook into the next indicated st/sp, YO and draw up a loop, (3 loops on hook) YO and draw through 2 loops, YO hook insert hook into the same st/sp, YO and draw up a loop, (4 loops on hook) YO draw through 2 loops, YO hook insert hook into the same st/sp, YO and draw up a loop, (5 loops on hook), YO draw through 2 loops, YO and pull through remaining 4 loops. One cluster made. 

Notes:
 *Chain stitch does not count in stitch count!
*The number at the end of each row is the stitch count for the row (#).
*Hat is worked from the bottom up! 

Size Adjusting tips: If you need a smaller or larger size around just make sure the Ribbing is a multiple of 4, for instance I have 32, 52, 56 & 60 for sizes - you can do 36, 40, 44, 48, 64 or 68 and so on. The rest of the hat will fall right into place. Easy adjusting for using other yarn types, size or tensions. 

Video Helps and walk through: 


18 In Doll 
 Measurements: Fit approx 12 inches around, 3 3/4 inches long

Ribbing:
Row 1: ch 4, (working in BLO only) sc in 2nd ch from the hook and each ch across, ch 1, turn (3) 
Row 2: sc in blo of each st across, ch 1, turn (3)
Row 3-32: Repeat Row 2
*Match up Row 1 and Row 32, sl st together in blo of each st across to join, ch 1 
*Do Not Fasten off!

Body of Hat: Make sure right side is facing.

Round 1: working along the ends of the rows, sc in each row around, join with a sl st to 1st sc, ch 1 (32)
Round 2: sc in same st as join, ch 3, 3dc cl in next st, ch1, sk 2 sts, *(sc in next st, ch 3, 3dc cl in next st, ch1 sk 2 sts) rep from * around, join with a sl st to 1st sc, ch 2, turn (8 - 3dc cl)
Round 3: *(sc, ch 3, 3dc cl) in next ch 3 sp, ch 1, rep from * around, join with a sl st to 1st sc, ch 2, turn (8 - 3dc cl) 
Round 4-6: rep Round 3
Round 7: *(sc in next ch 3 sp, ch 1), rep from * around join with a sl st to 1st sc, Fasten of and weave in ends. 


Kids 1-5  
Measurements: Fits approx 16-18 inches around, 6 1/2  inches long

Ribbing:
Row 1: ch 8, (working in BLO only) sc in 2nd ch from the hook and each ch across, ch 1, turn (7) 
Row 2: sc in blo of each st across, ch 1, turn (7)
Row 3-52: Repeat Row 2
*Match up Row 1 and Row 52, sl st together in blo of each st across to join, ch 1 
*Do Not Fasten off!

Body of Hat: Make sure right side is facing.

Round 1: working along the ends of the rows, sc in each row around, join with a sl st to 1st sc, ch 1 (52)
Round 2: sc in same st as join, ch 3, 3dc cl in next st, ch1, sk 2 sts, *(sc in next st, ch 3, 3dc cl in next st, ch1 sk 2 sts) rep from * around, join with a sl st to 1st sc, ch 2, turn (13 - 3dc cl)
Round 3: *(sc, ch 3, 3dc cl) in next ch 3 sp, ch 1, rep from * around, join with a sl st to 1st sc, ch 2, turn (13 - 3dc cl) 
Round 4-9: rep Round 3
Round 10: *(sc in next ch 3 sp, ch 1), rep from * around join with a sl st to 1st sc, Fasten of and weave in ends. 


Youth 5-10 
Measurements: Fits approx 18-20 inches around, 7 inches long


Ribbing:
Row 1: ch 8, (working in BLO only) sc in 2nd ch from the hook and each ch across, ch 1, turn (7) 
Row 2: sc in blo of each st across, ch 1, turn (7)
Row 3-56: Repeat Row 2
*Match up Row 1 and Row 56, sl st together in blo of each st across to join, ch 1 
*Do Not Fasten off!

Body of Hat: Make sure right side is facing.

Round 1: working along the ends of the rows, sc in each row around, join with a sl st to 1st sc, ch 1 (56)
Round 2: sc in same st as join, ch 3, 3dc cl in next st, ch1, sk 2 sts, *(sc in next st, ch 3, 3dc cl in next st, ch1 sk 2 sts) rep from * around, join with a sl st to 1st sc, ch 2, turn (14 - 3dc cl)
Round 3: *(sc, ch 3, 3dc cl) in next ch 3 sp, ch 1, rep from * around, join with a sl st to 1st sc, ch 2, turn (14 - 3dc cl) 
Round 4-10: rep Round 3
Round 11: *(sc in next ch 3 sp, ch 1), rep from * around join with a sl st to 1st sc, Fasten of and weave in ends. 


Pre-teen - Women’s 
Measurements: Fits approx 20-22 inches around, 8 inches long

Ribbing:

Row 1: ch 8, (working in BLO only) sc in 2nd ch from the hook and each ch across, ch 1, turn (7) 
Row 2: sc in blo of each st across, ch 1, turn (7)
Row 3-60: Repeat Row 2
*Match up Row 1 and Row 60, sl st together in blo of each st across to join, ch 1 
*Do Not Fasten off!

Body of Hat: Make sure right side is facing.

Round 1: working along the ends of the rows, sc in each row around, join with a sl st to 1st sc, ch 1 (60)
Round 2: sc in same st as join, ch 3, 3dc cl in next st, ch1, sk 2 sts, *(sc in next st, ch 3, 3dc cl in next st, ch1 sk 2 sts) rep from * around, join with a sl st to 1st sc, ch 2, turn (15 - 3dc cl)
Round 3: *(sc, ch 3, 3dc cl) in next ch 3 sp, ch 1, rep from * around, join with a sl st to 1st sc, ch 2, turn (15 - 3dc cl) 
Round 4-11: rep Round 3
Round 12: *(sc in next ch 3 sp, ch 1), rep from * around join with a sl st to 1st sc, Fasten of and weave in ends. 

Copyright 2017 Calleigh's Clips and Crochet Creations

Please do not copy and/or redistribute this pattern, but direct people back to the blog post.

Thank you for using a Calleigh’s Clips original pattern. I have done my best to keep my patterns simple and easy to understand. If at any time you need assistance, please feel free to contact me using the contact me tab.

Please remember that there may be a slight variance in sizing due to different tensions of each individual and materials used.

All patterns are copyright protected, but you are welcome to sell finished products made from my patterns. I do ask, however, that you mention my company name along with my web shop address as follows:

Calleigh’s Clips & Crochet Creations by Elisabeth Spivey 


Enjoy,
Elisabeth

Be sure to check out the rest of the Key Tab Series 
Links to the other patterns! 
Slouchy

Saturday, November 26, 2016

Parker Pom Hat : Free Crochet Pattern


I've been visiting family in Parker, Colorado for the Thanksgiving Holiday! I was finishing this new hat design and on Tuesday it began to snow. It was the perfect time to grab up some pics and have fun. This hat is perfect for this type of weather. It's got a fun cluster stitch and double thick band to keep it fluffy, cozy and warm in the cooler weather. The hat is inspired by the City and Snow! 


Be sure to add this to you Raverly Favorites

Be Sure to check out our Black Friday- Cyber Monday Deals too!!


Enjoy! This Forever Freebie! 


Parker Pom Hat

Yarn : Worsted Weight Yarn of Choice 
Samples I used Hobby Lobby I Love This Yarn and Vanna’s Choice 

Hook : H-(5.00mm)
Tapestry Needle

Terms and Stitches:
ch - chain
sc - single crochet
blog - back loop
YO - yarn over
st - stitch
sl - slip


Video to help with Round 2 ( all Sizes)

Child size 
Approx. 18-20 inches / 8.5 inches tall 


Ribbing:

Row 1: ch 15, (working in BLO only) sc in 2nd ch from the hook and each ch across, ch 1, turn (14) 
Row 2: sc in blo of each st across, ch 1, turn (14)
Row 3-60: Repeat Row 2
*Match up Row 1 and Row 60, sl st together in blo of each st across to join, ch 1 
*Do Not Fasten off!

Body of Hat:

Make sure right side is facing.

Round 1: working along the ends of the rows, sc in each row around, join with a sl st to 1st sc, ch 1 (60)
Round 2: sc in 1st st, *pull up a loop in same st as last st made and in next 2 sts, YO and draw through all 4 loops on hook, ch 1 (NOTE: work ch 1’s loosely through out the pattern as you’ll be working into it on the next round), repeat from * around, sc in last st, join with a sl st to 1st sc, TURN

Round 3-16 : Rep round 2

Fasten off but leave a long tail to close the top of the hat. 
Whip Stitch around the hat evenly around. Pull the top of the hat closed. Weave in the end until the top is closed tight. Weave in all ends. 

Optional : Make a Pom Pom as desired and sew it to the top of the hat


Youth 
Approx: 20-22 inches / 9 inches tall 

Ribbing:

Row 1: ch 15, (working in BLO only) sc in 2nd ch from the hook and each ch across, ch 1, turn (14) 
Row 2: sc in blo of each st across, ch 1, turn (14)
Row 3-66: Repeat Row 2
*Match up Row 1 and Row 66, sl st together in blo of each st across to join, ch 1 
*Do Not Fasten off!

Body of Hat:

Make sure right side is facing.

Round 1: working along the ends of the rows, sc in each row around, join with a sl st to 1st sc, ch 1 (66)
Round 2: sc in 1st st, *pull up a loop in same st as last st made and in next 2 sts, YO and draw through all 4 loops on hook, ch 1 (NOTE: work ch 1’s loosely through out the pattern as you’ll be working into it on the next round), repeat from * around, sc in last st, join with a sl st to 1st sc, TURN

Round 3-18 : Rep round 2

Fasten off but leave a long tail to close the top of the hat. 
Whip Stitch around the hat evenly around. Pull the top of the hat closed. Weave in the end until the top is closed tight. Weave in all Ends

Optional : Make a Pom Pom as desired and sew it to the top of the hat

Adult 
Approx.  21-23 inches / 10 inches tall

Ribbing:

Row 1: ch 15, (working in BLO only) sc in 2nd ch from the hook and each ch across, ch 1, turn (14) 
Row 2: sc in blo of each st across, ch 1, turn (14)
Row 3-76: Repeat Row 2
*Match up Row 1 and Row 76, sl st together in blo of each st across to join, ch 1 
*Do Not Fasten off!

Body of Hat:

Make sure right side is facing.

Round 1: working along the ends of the rows, sc in each row around, join with a sl st to 1st sc, ch 1 (76)
Round 2: sc in 1st st, *pull up a loop in same st as last st made and in next 2 sts, YO and draw through all 4 loops on hook, ch 1 (NOTE: work ch 1’s loosely through out the pattern as you’ll be working into it on the next round), repeat from * around, sc in last st, join with a sl st to 1st sc, TURN 

Round 3-20 : Rep round 2

Fasten off but leave a long tail to close the top of the hat. 
Whip Stitch around the hat evenly around. Pull the top of the hat closed. Weave in the end until the top is closed tight. Weave in all ends. 


Optional : Make a Pom Pom as desired and sew it to the top of the hat


Cousins showing off their Parker Pom Hats! 


Friday, November 4, 2016

Enchanting Elf Hat : Free Crochet Pattern

Christmas is just around the corner. I'd recently made this fun Lil' Goblin Hat, but just missed Halloween time frame to post the pattern. So, before it was to late I thought how perfect would it be to turn it into a Elf Hat for the Holidays! I'm just in love with it! I hope you like it too! Enjoy! 

Be Sure to Add This To Your Ravelry Favorites


Enchanting Elf Hat 
size Nb - 2 mo (13-14 inches) 
Measures 7 inches across by 5 inches long (rows10-30, excluding pixie tip)


Materials: 
Worsted Weight Yarn (red, green and cream) 
I used 1 Skein Each: 
Lionbrand Heartland in Colorways : Redwood, Joshua Tree, & Acadia

H-Hook : 5mm
Tapestry Needle 
Scissors 

Gauge: 8 sc in 9 rows = 2 x 2 in square

Stitches Used: 

ch: chain
sl: slip  
st: stitch
sc: single crochet
rem: remaining 
sc2tog: single crochet 2 stitches together


Notes:
*Join each round with a sl st to 1st stitch of the round
*Chain stitch at beginning of the row is NOT counted in stitch count.
*For Stripes change colors every 3 rounds.

Starting with Red (Redwood) 

Round 1: ch 2, in the 2nd ch from the hook work 6 sc, join with a sl st (6) 
Round 2: ch 1, sc in each st around, join (6)
Rounds 3-6: Repeat Round 2 
Round 7: ch 1,*(2 sc in the next st, sc in next st) rep from * around,  join (9)
Round 8: ch 1, sc in each st around, join (9)
Round 9: Repeat Round 8
Round 10: ch 1, 2 sc in 1st st, sc in rem sts around, join (10) 
Round 11: ch 1, sc in each st around, join (10)
Round 12: ch 1, 2 sc in each st around, join (20)
Round 13: ch 1, sc in each st around, join (20)
Round 14: ch 1, *(2 sc in next st, sc in next st) rep from * around,  join (30)
Round 15: ch 1, sc in each st around, join (30)
Round 16: ch 1, *(2 sc in next st, sc in next 2 sts) rep from * around, join (40)
Round 17: ch 1, sc in each st around, join (40)
Round 18: ch 1, *(2 sc in next st, sc in next 3 sts) rep from * around, join (50)
Round 19: ch 1, sc in each st around, join (50)
Rounds 20-30:  Rep Round 19
Fasten off Weave in Ends 

Earflaps

Right Earflap: 
Row 1: from the last st made of round 30, count over 9 sts to the left, join with a sl st in that 9th st, sc in same st as join and next 7 sts, ch 1, turn (8)
Row 2: sc in each st across, ch 1, turn (8)
Rows 3-5 Rep Row 2 
Row 6: sc in each st across, fasten off & weave in ends

Left Earflap: 
Row 1: From the last st made of round 30. count over 17 sts to the right, join with a sl st in the 17th st and the next 7 sts, ch 1, turn (8)
Row 2: sc in each st across, ch 1, turn (8)
Rows 3-5: Rep Row 2 
Row 6: sc in each st across, fasten off & weave in ends

Edging: Join with a sl st to the last st made of Round 30, sc evenly around the the last row and earflaps, be sure to work 2 sc in the corners of the earflaps for shaping. join with a sl st, fasten off & weave in ends


Ears: (Make 2) 

Work ears in a continuous round, do not join. 
Use a stitch marker to mark rounds if desired. 

Round 1: Working with Acadia/Cream - ch 2, in 2nd ch from the hook work 6 sc (6)
Rounds 2-4: sc in each st around (6)
Round 5: *(2 sc in next st, sc in next st) * around (9)
Round 6-8: sc in each st around (9)
Round 9 *(2 sc in next st, sc in next 2 sc)* around (12)
Round 10-12: sc in each st around (12)
Round 13: *(2 sc in next st, sc in next st) * around (18)
Round 14: sc in each st around (18)
Round 15: *(sc2tog, sc in next st)* around (12)
Round 16: sc in each st around (12)
Fasten off leaving a long tail to sew Ear to Hat. 


Fold ear slightly less than half way to shape the ear, then sew it to hat. 
See main picture for placement. Fasten off and weave in all end! 


If you'd like to make the Goblin hat instead it's basically just color changes and not striped. You can find that example pattern by clicking the image below! 


Thursday, November 3, 2016

Lil' Goblin Hat : Free Crochet Pattern

Way back in 2010 when Calleigh's Clips and Crochet Creations was just starting, I was commissioned to create a Goblin Hat for a little boy's Halloween Costume. You can read about that on this post or in my Ravelry Projects. Well here 6 years later someone found the picture and asked me to recreate it for their little newborn. I had to re-re-create the design as it's had been so long! LOL I couldn't remember what I'd done and I hadn't followed a pattern. So I though now would be a good time to write out the pattern as I made it. Although I'm a few days late for Halloween now you have plenty of time to make it for next year, plus I turned it into an Enchanting Elf Stripped Hat just in time for Christmas! PS: If that link doesn't work it will be loaded sometime Friday/Saturday!! :) 

Be Sure to Add This To Your Ravelry Favorites


Lil' Goblin Hat
size Nb - 2 mo (13-14 inches) 
Measures 7 inches across by 5 inches long (rows10-30, excluding pixie tip)


Materials: 
Worsted Weight Yarn 
I used 1 Skein Each: 
Hobby Lobby's, I Love This Yarn Worsted in Brown and Mid Green

H-Hook : 5mm
Tapestry Needle 
Scissors 

Gauge: 8 sc in 9 rows = 2 x 2 in square

Stitches Used: 

ch: chain
sl: slip  
st: stitch
sc: single crochet
rem: remaining 
sc2tog: single crochet 2 stitches together


Notes:
*Join each round with a sl st to 1st stitch of the round
*Chain stitch at beginning of the row is NOT counted in stitch count.

Round 1: With Brown - ch 2, in the 2nd ch from the hook work 6 sc, join with a sl st (6) 
Round 2: ch 1, sc in each st around, join (6)
Rounds 3-6: Repeat Round 2 
Round 7: ch 1,*(2 sc in the next st, sc in next st) rep from * around,  join (9)
Round 8: ch 1, sc in each st around, join (9)
Round 9: Repeat Round 8
Round 10: ch 1, 2 sc in 1st st, sc in rem sts around, join (10) 
Round 11: ch 1, sc in each st around, join (10)
Round 12: ch 1, 2 sc in each st around, join (20)
Round 13: ch 1, sc in each st around, join (20)
Round 14: ch 1, *(2 sc in next st, sc in next st) rep from * around,  join (30)
Round 15: ch 1, sc in each st around, join (30)
Round 16: ch 1, *(2 sc in next st, sc in next 2 sts) rep from * around, join (40)
Round 17: ch 1, sc in each st around, join (40)
Round 18: ch 1, *(2 sc in next st, sc in next 3 sts) rep from * around, join (50)
Round 19: ch 1, sc in each st around, join (50)
Rounds 20-30:  Rep Round 19
Fasten off Weave in Ends 

Earflaps

Right Earflap: 
Row 1: from the last st made of round 30, count over 9 sts to the left, join with a sl st in that 9th st, sc in same st as join and next 7 sts, ch 1, turn (8)
Row 2: sc in each st across, ch 1, turn (8)
Rows 3-5 Rep Row 2 
Row 6: sc in each st across, fasten off & weave in ends

Left Earflap: 
Row 1: From the last st made of round 30. count over 17 sts to the right, join with a sl st in the 17th st and the next 7 sts, ch 1, turn (8)
Row 2: sc in each st across, ch 1, turn (8)
Rows 3-5: Rep Row 2 
Row 6: sc in each st across, fasten off & weave in ends

Edging: Join with a sl st to the last st made of Round 30, sc evenly around the the last row and earflaps, be sure to work 2 sc in the corners of the earflaps for shaping. join with a sl st, fasten off & weave in ends


Ears: (Make 2) 

Work ears in a continuous round, do not join. 
Use a stitch marker to mark rounds if desired. 


Round 1: Using Mid Green - ch 2, in 2nd ch from the hook work 6 sc (6)
Rounds 2-4: sc in each st around (6)
Round 5: *(2 sc in next st, sc in next st) * around (9)
Round 6-8: sc in each st around (9)
Round 9 *(2 sc in next st, sc in next 2 sc)* around (12)
Round 10-12: sc in each st around (12)
Round 13: *(2 sc in next st, sc in next st) * around (18)
Round 14: sc in each st around (18)
Round 15: *(sc2tog, sc in next st)* around (12)
Round 16: sc in each st around (12)
Fasten off leaving a long tail to sew Ear to Hat. 


Fold ear slightly less than half way to shape the ear, then sew it to hat. 
See main picture for placement. Fasten off and weave in all end! 


Thursday, December 10, 2015

Thin Blue Line Beanie Crochet Pattern

Today is a exciting yet sad day for me! My sweet hubby has been working at Hobby Lobby Corp. for 5 years! Today is his last day! I'm sure going to miss my discount!  Aside from that this is a wonderful change for my hubby and our family! 

My hubby has been working very hard at Hobby Lobby in transportation, part time as a reserve policy officer and going to academy this past year. He graduated a few months back but He will officially start as a full time officer Jan 2016. I'm very proud of him.  He's wanted to be an officer for as long as we've been together and I'm so glad to see his dream finally come true! 

These changes bring on more changes in the next few month but I'll share those as they come about! I see a move by next summer and some adjustment as schedules change and such! I don't mine change but the next few months are going to be a bit of a roller coaster. 

My hubby asked me to make some hats for some of his officer buddies for Christmas. 
So I thought I'd write up a simple pattern for a Thin Blue Line Beanie. 


It works up quick and is an average Man/Women Size Beanie. 
I may add sizes as I have time but for now it's just the one. 

I hope you will make these in support of our Police Officers or for an Officer you know! 
They sure need to know we stand by them! 


Thin Blue Line Beanie

Be sure to add to your Raverly Favorites and 
Pin the post for later! Thanks!


Hobby Lobby I Love This Yarn Worsted Weight  
1 Skein of Black and small amount of Royal Blue
H-hook (5.00mm)

Hat Gauge 4” x 4” swatch = 8 rows of 14 dc

Terms and Stitches
ch - chain
sc - single crochet
hdc - half double crochet
dc - double crochet
fphdc - front post half double crochet
bphdc- back post half double crochet
sl - slip
st - stitch
rep- repeat

Fits 21-23 inches  - Measures 8 1/2 long but 10 inch wide

NOTES:
*join each round with a sl st to the 1st st of the round
*ch 1 does not count as a st in the st count
*number in (#) is the stitch count for the round


Starting with Black
Round 1: ch 2, 10 sc in 2nd ch from the hook, join, ch 2 (10)
Round 2: 2 dc in each st around, join, ch 2 (20)
Round 3: *(2 dc in next st, dc in next st,) rep from * around, join ch 2 (30)
Round 4: *(2 dc in next st, dc in next 2 sts) rep from * around, join, ch 2 (40)
Round 5: *(2 dc in next st, dc in next 3 sts) rep from * around, join, ch 2 (50)
Round 6: *(2 dc in next st, dc in next 4 sts) rep from * around, join, ch 2 (60)
Round 7: *(2 dc in next st, dc in next 9 sts) rep from * around join, ch 2 (66)
Round 8: dc in each st around, join, ch 2 (66)
Round 9-15: rep Round 8

Switch to Royal Blue, Do not fasten off Black
Round 16: hdc in each st around, join ch 1 (66)
Round 17: hdc in each st around, join, ch 2 (66)
Switch back to Black, Fasten off Royal Blue
Round 18: dc in each st around, join , ch 1 (66)
Round 19: *(FPHDC in next st, BPHDC in next st) rep from * around, ch 1 (66)
Round 20: rep Round 19, join, fasten off and weave in ends. 

My Hubby showing off his hat! 


Friday, October 9, 2015

Free Crochet Pattern: Acorn Headpiece

I'm really having fun coming up with a new headpiece each month.  This October I was drawn to fall. I was inspired while out on a morning run.  I had to avoid jogging across many acorns that had fallen off a the trees. I thought they were cute though and it would be fun to design something around that theme. 


If you are not familiar with the headpieces. They are basically hats for small dogs, cats or stuffed animals. My kids love to dress up their critters! 

My sweet Lucy doesn't enjoy wearing these so much haha,
but she will endure it long enough for me to bribe her with a treat! 


Thanks again to my awesome mom over at 
for Testing the pattern. Max is usually a great model but he's having some allergy issues so he looks a little sad but he really loves to show of his mommy's creations! Be sure to check out her blog for lots of free patterns for dogs and of course for humans too! 

Now on to the pattern! That's what you're here for right! 

Be sure to add this to your Ravelry Favorites


Acorn Headpiece
Sized for 2-3 inches between the ears and about 10-12 inches around the head


F- Hook: (3.75 MM) 

Yarn: I Used Hobby Lobby's - I Love This Yarn (worsted-4)
Brown and Toasted Almond

Notes:
*Chain stitch does not count in stitch count!
*The number at the end of each row is the stitch count for the row (#).

Terms and Stitches: 
*r - row or round
*ch - chain
*sc - single crochet
*sl st - slip stitch
*st - stitch
* YO - Yarn Over

Starting with Brown

R1: Ch 2, 6 sc in 2nd ch from the hook, join with sl st to 1st sc (6) 
R2: Ch 1, 2 sc in each st around, join with sl st to 1st sc (12)
R3: Ch 1, *(2 sc, sc) repeat from * around, join with sl st to 1st sc (18)
R4: Ch 1, *(2 sc, sc 2) repeat from * around, join with sl st to 1st sc (24)

See Video Tutorial at end of post for R5-7, Please note you will turn at the end of rows 5-6) 

R5: ch 1, sc in 1st st, *pull up a loop in same st as last st made and in next 2 sts, YO and draw through all 4 loops on hook, ch 1 (NOTE: work ch 1’s loosely through out the pattern as you’ll be working into it on the next round), repeat from * around, sc in last st, TURN

R6-7: Repeat Row 5, Do not turn at the end of row 7

Switch to Toasted Almond,Fasten off Brown
R8: Ch 1, sc in the Back Loop of each st around (24)
R9: Ch 1, *(2 sc , sc 3) repeat from * around, join with sl st to 1st sc (30)
R10: Ch1, *(2 sc, sc 4) repeat from * around, join with sl st to 1st sc (36) 
R11: Ch 24, sk 6 sts, sl st in next st, sc in next 11 sts, sl st in next st, ch 24, sk 6 sts, sl st in next st, sc in remaining st to beginning ch-24, DO NOT JOIN
R12: sc in next 12 chs, ch 46, sl st in 2nd ch from the hook and next 45 chs, sl st in next 12 chs, sc in next 12 sts, sc in next 12 chs, ch 46, sl st in 2nd ch from the hook and next 45 chs, sl st in remaining sts to 1st sc, 
*Fasten off and weave in ends. 

Stem: 
R1: ch 5, sc in the 2nd ch from the hook and each ch across , ch 1, turn (4)
R2: sc dec over the next 2 sts, sc in last 2 sts, ch 1, turn (3)
R3: sc dec over the next 2 sts, sc in last st, ch 1, turn (2)
R4: sc dec over the next 2 sts, (1)
Fold stem in half vertically, whip stitch down the back to make a tube, sew stem to center of hat. 
*Fasten off and Weave in Ends. 

Video Help for R: 5-7


Be sure to check out all our other Free Headpieces
Pumpkin, Apple, Shark, & Christmas
Just Click on over to the Crochet Pattern Tab